How to Measure with Blender
· 2 commentsWhy Blender
Why drill wood for fire when there's a lighter in your pocket?
Placing the second prop in-game is guesswork.
We drag it, rotate it with a dial, hit confirm, and test it. Wrong. We go back, drag again, rotate again, test again. Every cycle costs candles and time. And there's nothing to aim at — no grid, no coordinates, no reference.
Blender gives us the reference. The full map model, in front of us. What we see in Blender is what we need in-game — we know roughly where the second prop should go before opening the game.
Preparation
- A computer.
A girlfriend.A cat.- Blender, the free 3D software — blender.org/download
- The map model — The level meshes belong to the game, and redistributing them isn't what I can do here. But we can take a look at SkyVEx on Github or dm me for help.
- The prop model — Download
Setting Up A and B
Import the map model. We'll see the whole map, same as in-game.
A few controls help us move around it. In the top-right corner of the viewport sits the navigation gizmo.
The ball at the top carries the X, Y, and Z axes. Drag it to rotate our view freely.
Below the ball are four buttons. Only two of them are needed here:
The magnifier zooms. Same as scrolling the mouse wheel.
The hand button pans the view. Same as holding Shift and dragging the middle mouse button.
Use these to fly around the model and find the spot we're aiming for.
Setting up A
Put the 3D cursor where the first prop goes. Shift+Right-click the spot on the map model, and the cursor lands where we clicked.
Add a cube — click Add in the Viewport header, then Mesh → Cube. The cube appears at the cursor, which is where we put it.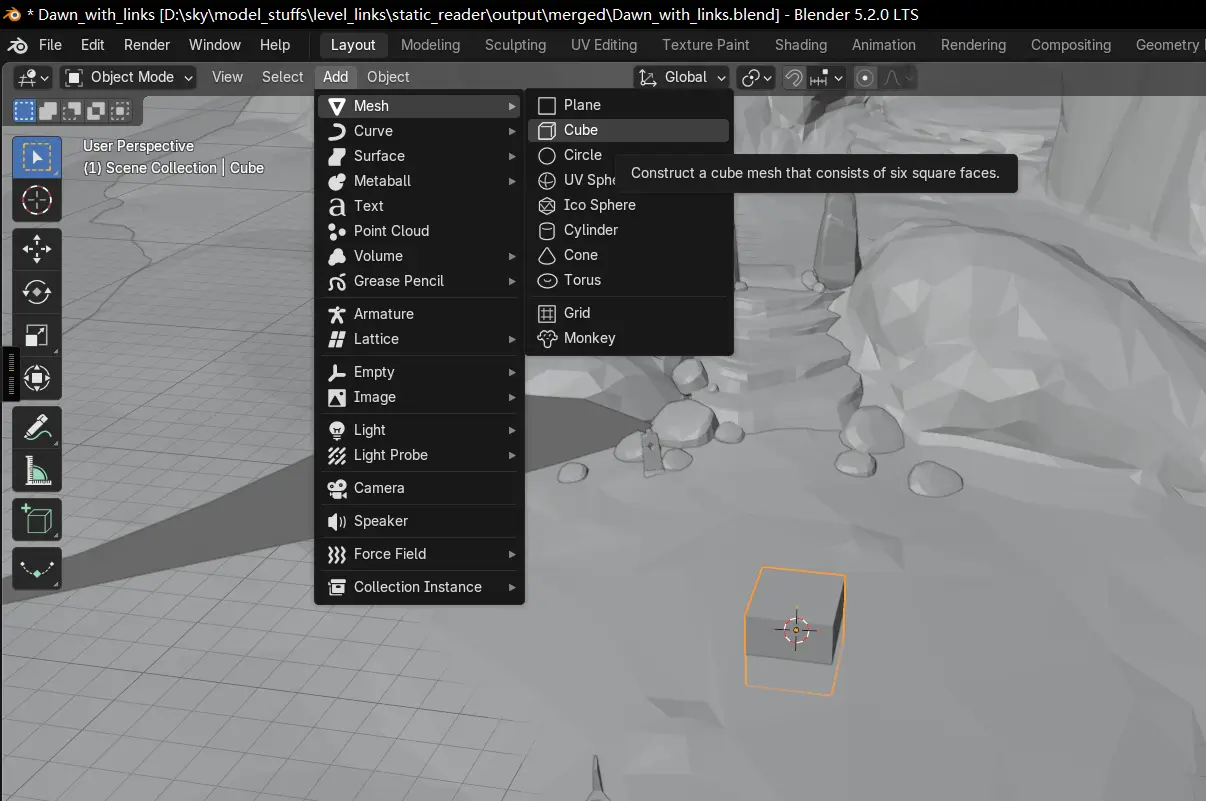
We use A to refer to this cube.
Setting up B
Import the prop model. From the top menu bar, choose File → Import/Export → Import → glTF 2.0 (.glb/.gltf). In the file browser that opens, navigate to the .glb file we downloaded in the preparation step, select it, and click Import glTF 2.0 in the bottom-right corner.
Likewise, we use B to refer to this model.
Leave B at the world origin. Don't move or rotate it — leave it as-is.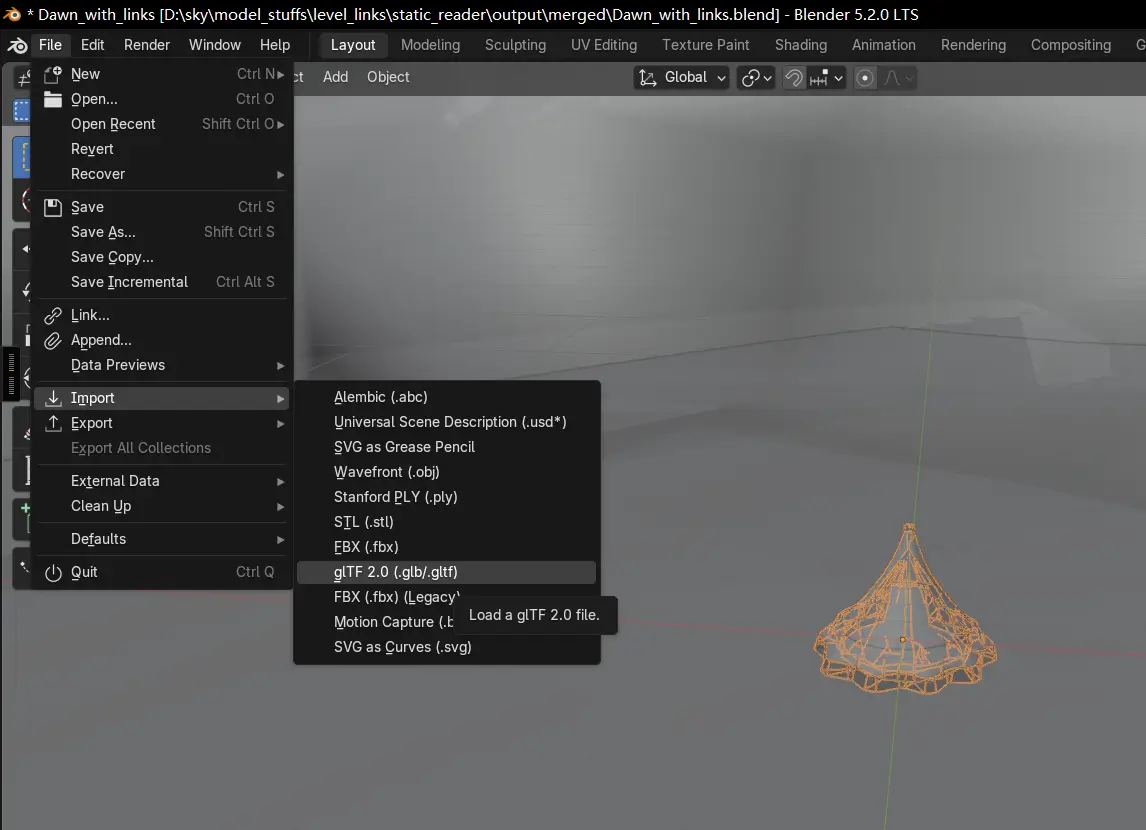
Now A sits at the first prop's position. B sits at the origin.
Merge and Set the Origin
Now look at the Outliner on the right. A should be named Cube — the default name for a newly added cube. B should be named mesh — the default name of the prop model.
Select A first, then B in the Outliner. Both should be highlighted in orange.
Move the mouse into the main 3D area, the 3D Viewport. Right-click to open the Object Context Menu, then choose Join.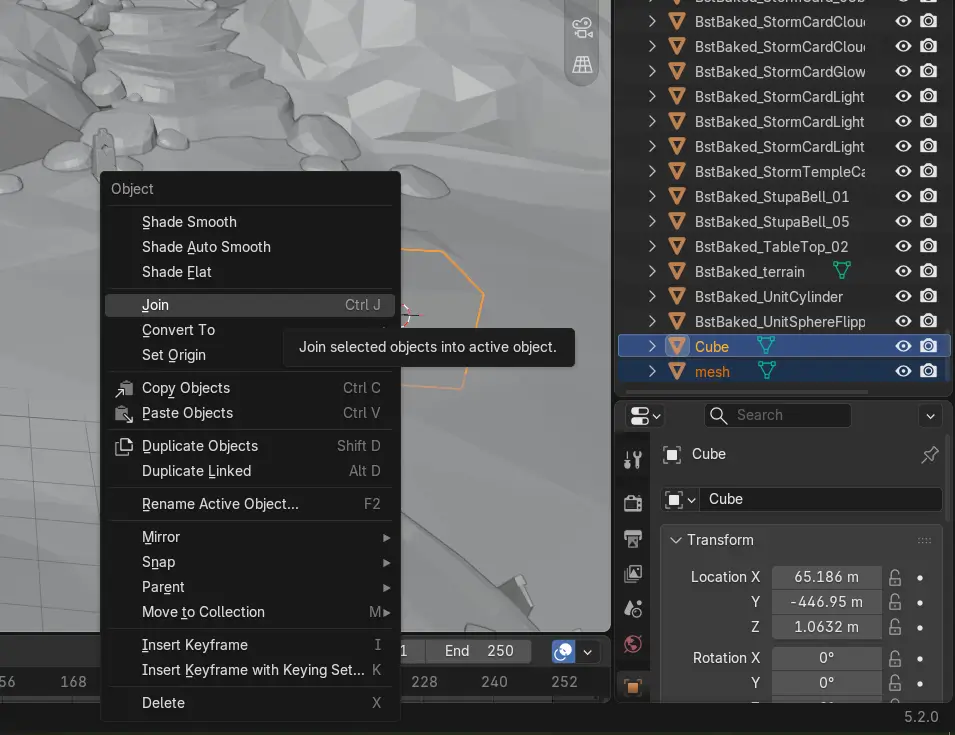
Now check the merged object's name in the Outliner. It should be Cube — that's A's name. If it shows mesh, something went wrong. Ctrl+Z and do it again.
Now the merged object's origin is on A. B is positioned relative to A.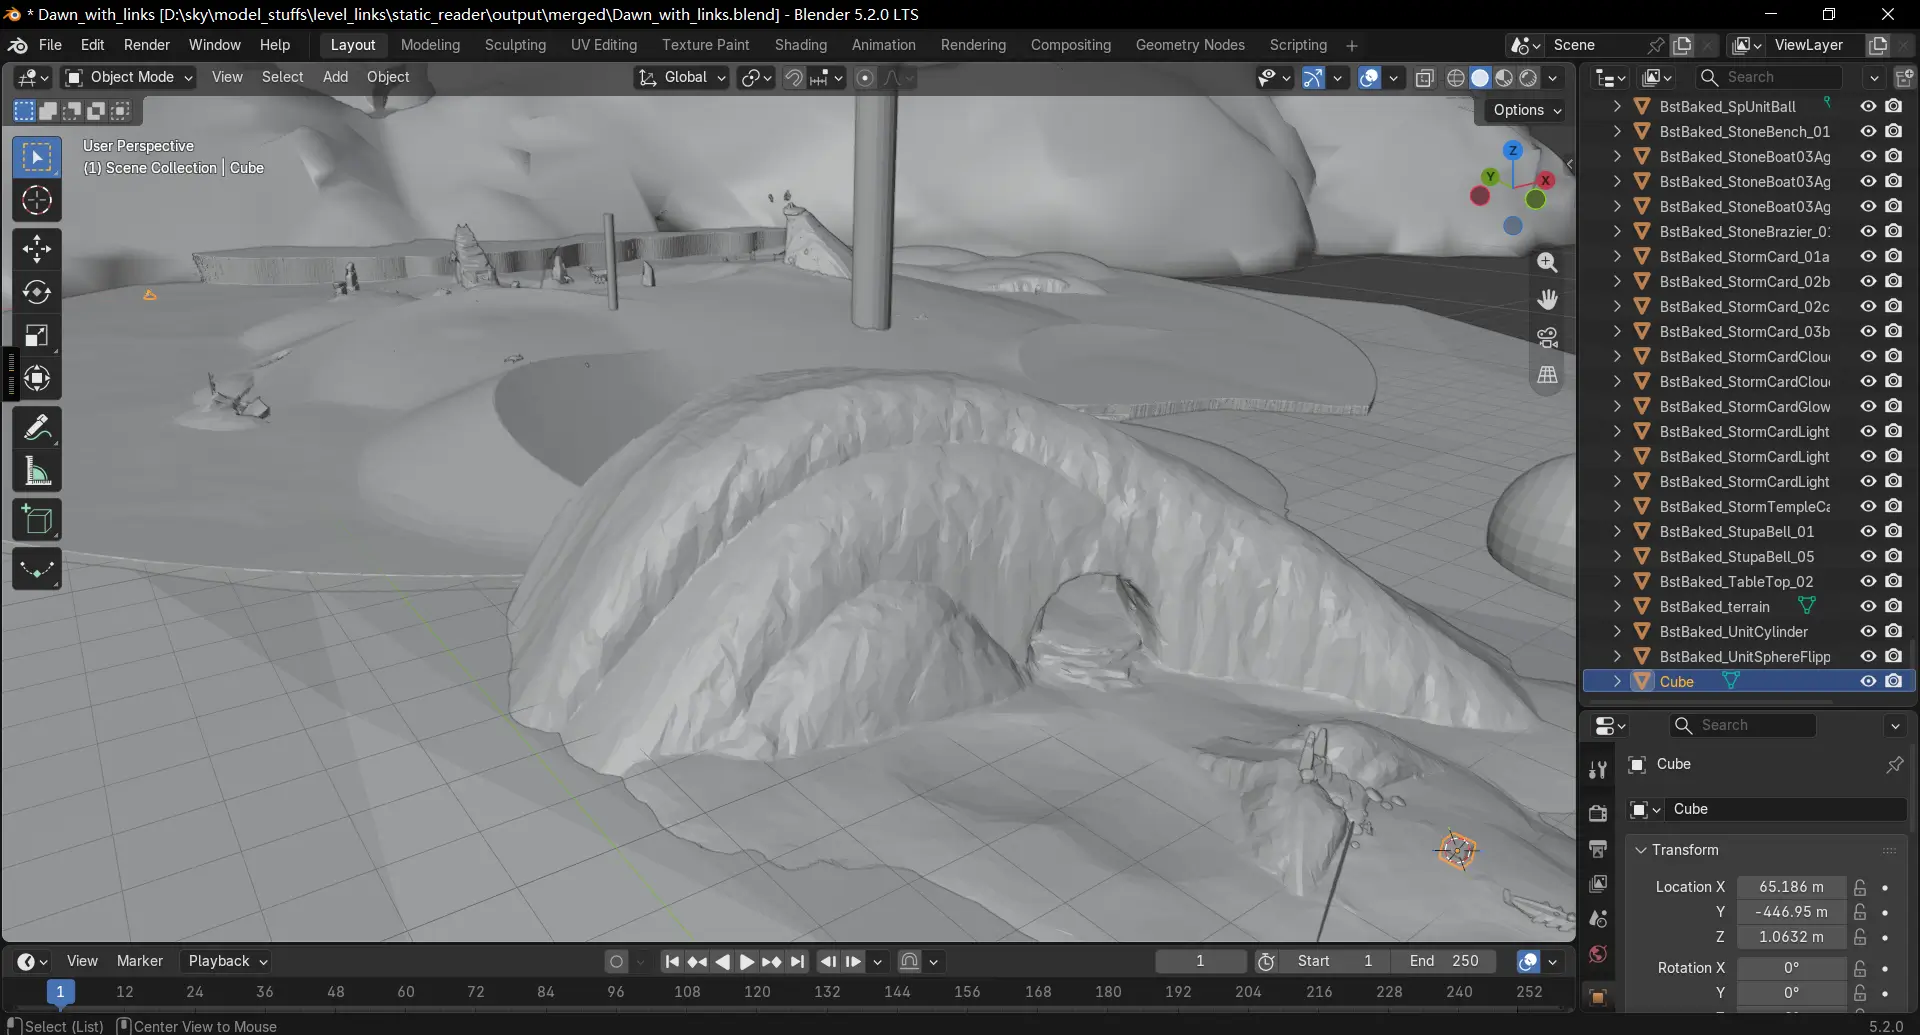
Move to the Destination and Rotate
Set the 3D cursor to the destination. Shift+Right-click the spot on the map model where we want players to land.
Open the Snap menu with Shift+S, then choose Snap → Selection to Cursor. The merged object moves, so its origin (A) sits on the destination. A is now the landing point.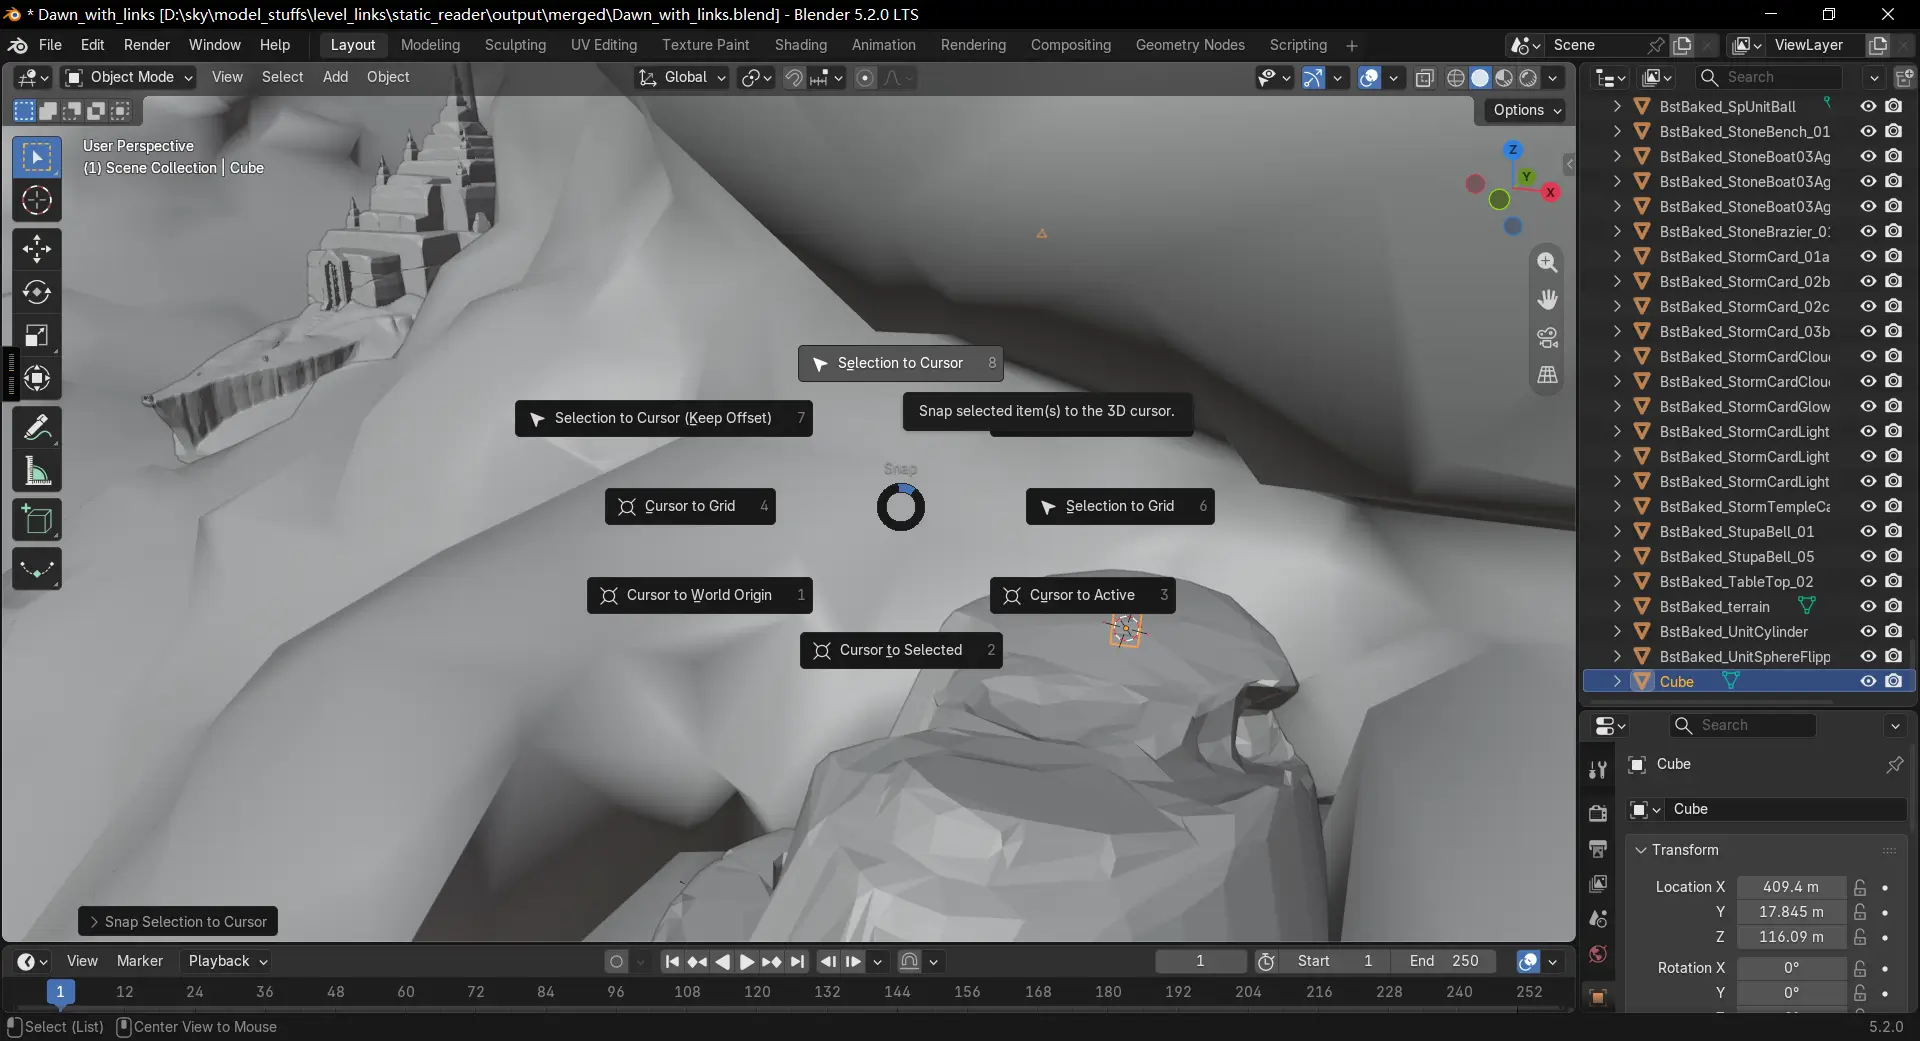
Press Alt+Z to toggle X-Ray mode. The scene turns transparent, letting us see B through walls and clouds, with a yellow outline that makes it easy to track as we rotate.
Now rotate A in the Transform panel on the right side of the Properties editor. Find the Rotation Z field and drag it. As we rotate, B circles around A.
Stop when B lands in a nice spot — no wind walls, out of bounds, reachable, and so on.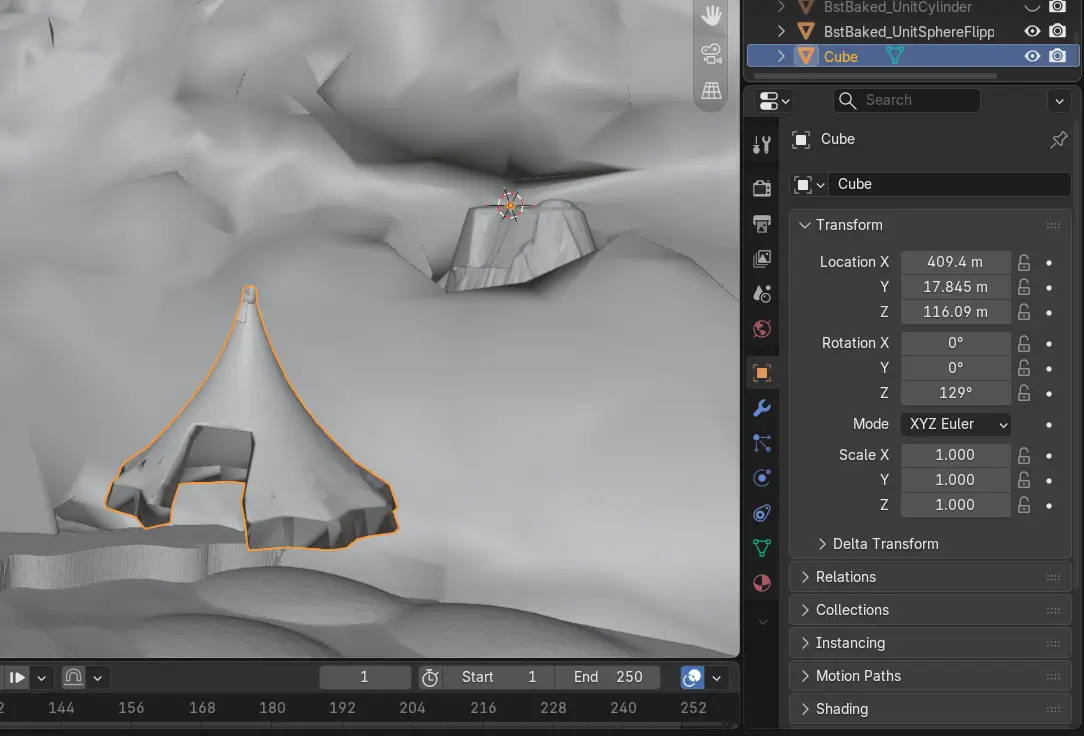
Keep the X and Y rotation at multiples of 90 degrees — 0, 90, 180, and 270. Those angles let the prop sit flat in mid-air, which is much easier to place in-game.
The Second Point
Let's do it again for the second candle cake in Isle of Dawn.
Put the 3D cursor there. Add a cube — that's A for this point.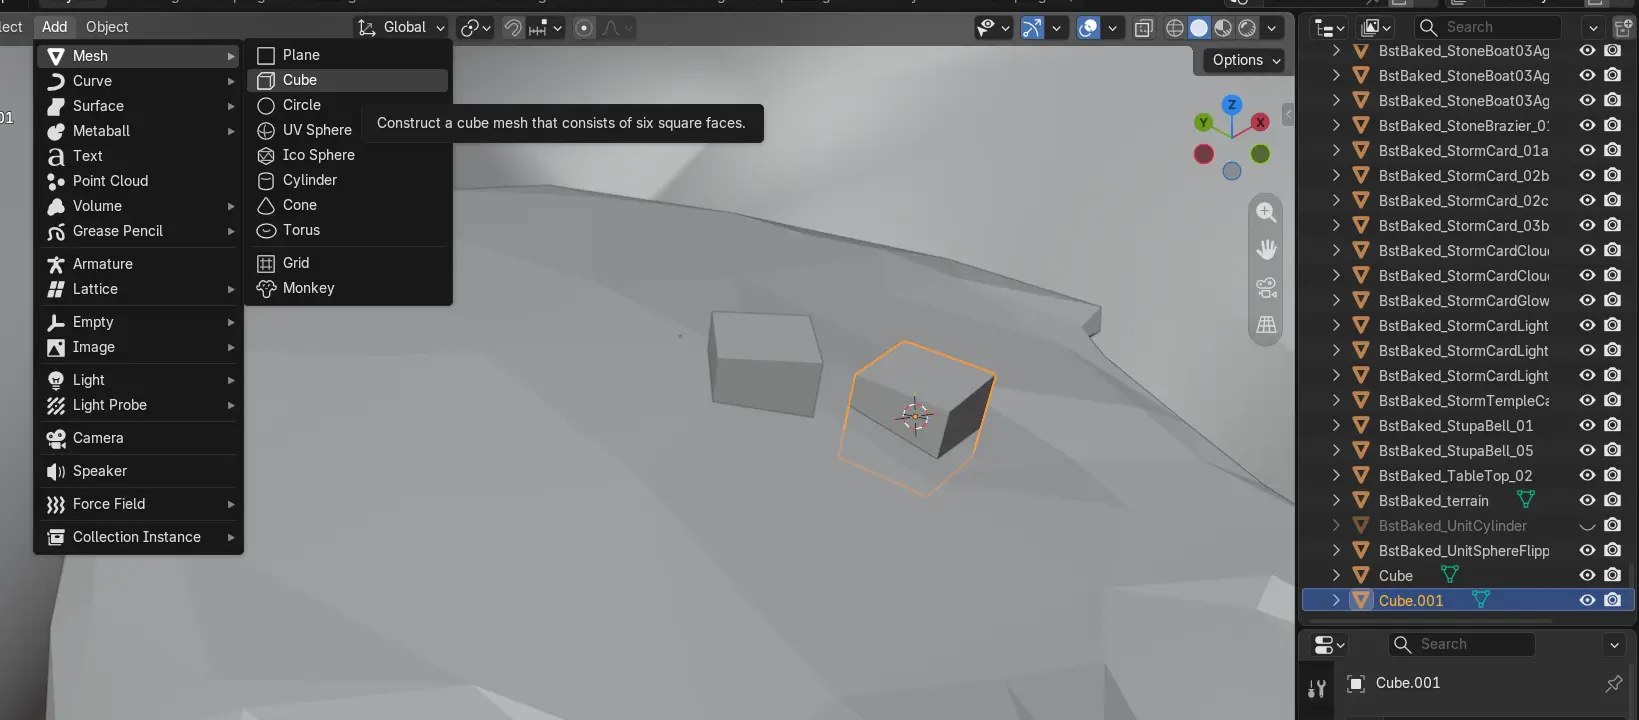
Import the prop model — that's B. Leave B at the origin.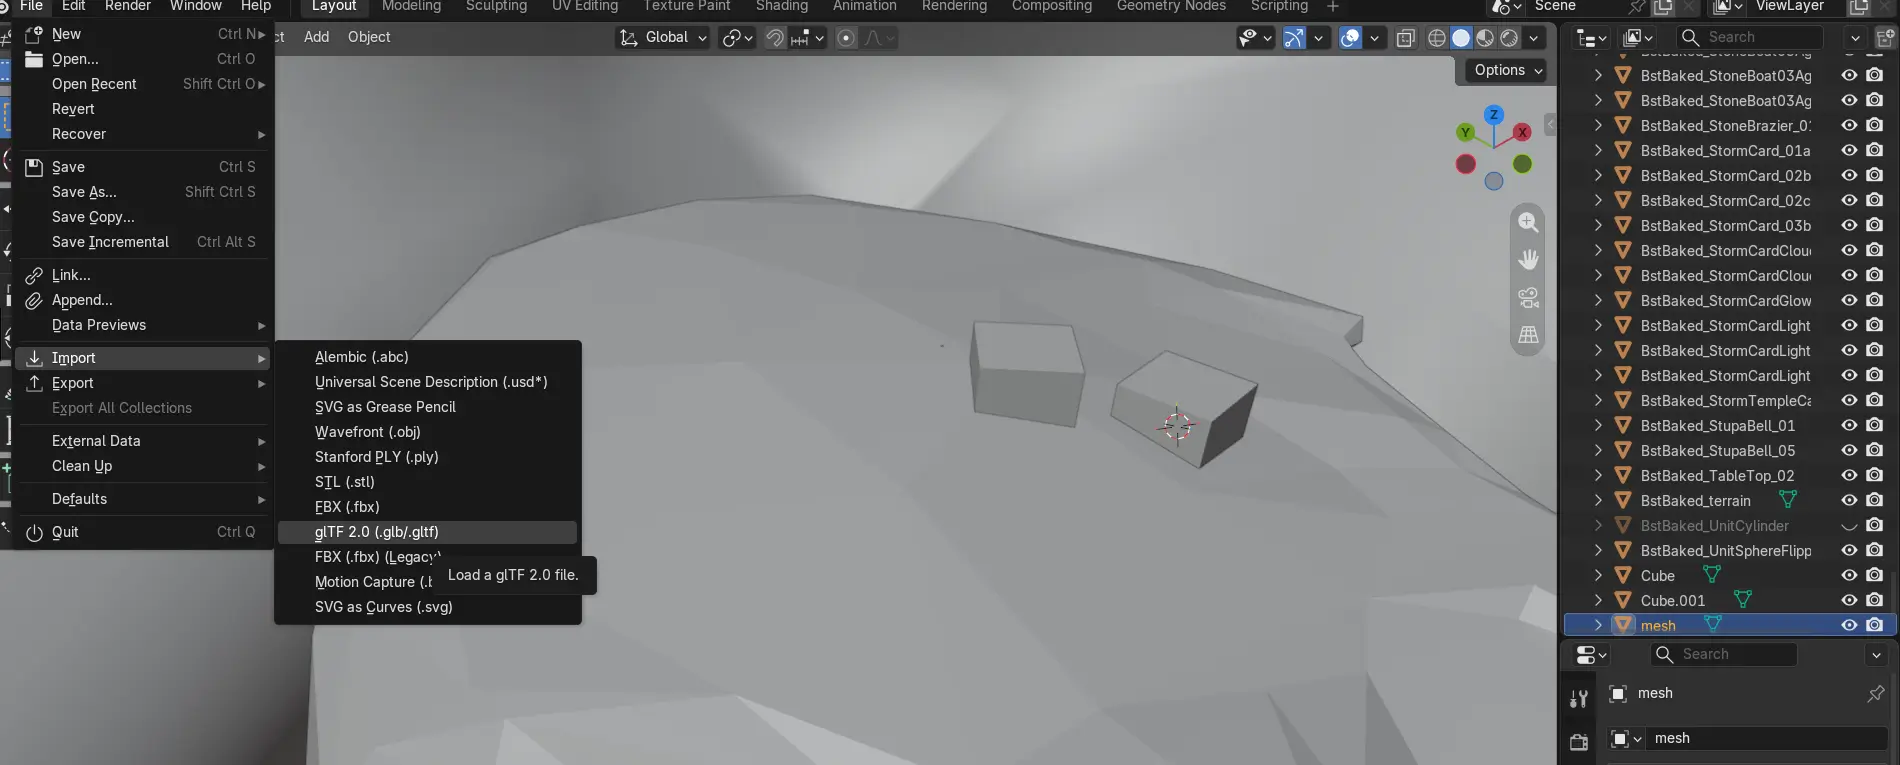
Select A, then B, and join them. Check the merged object's name is still Cube.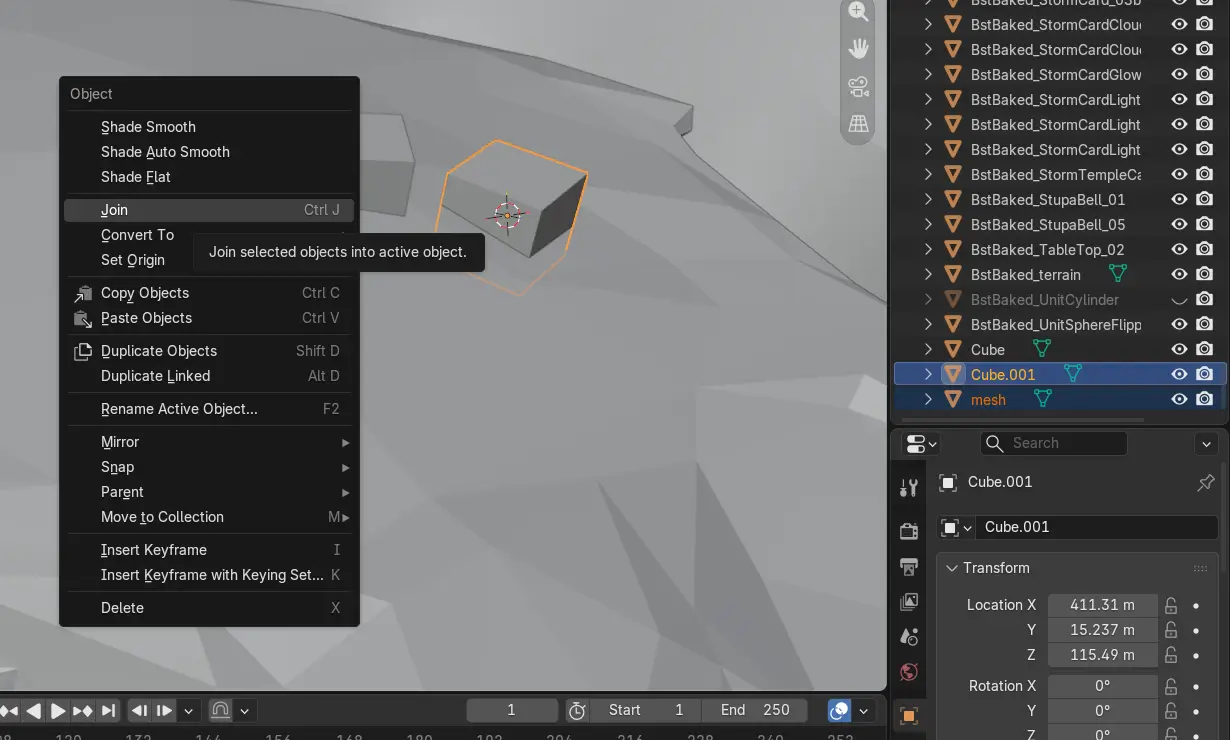
Set the 3D cursor to this point's destination. Don't forget Alt+Z toggles X-Ray mode, which makes finding the destination easier. Use Shift+S → Snap → Selection to Cursor. The origin lands on the destination.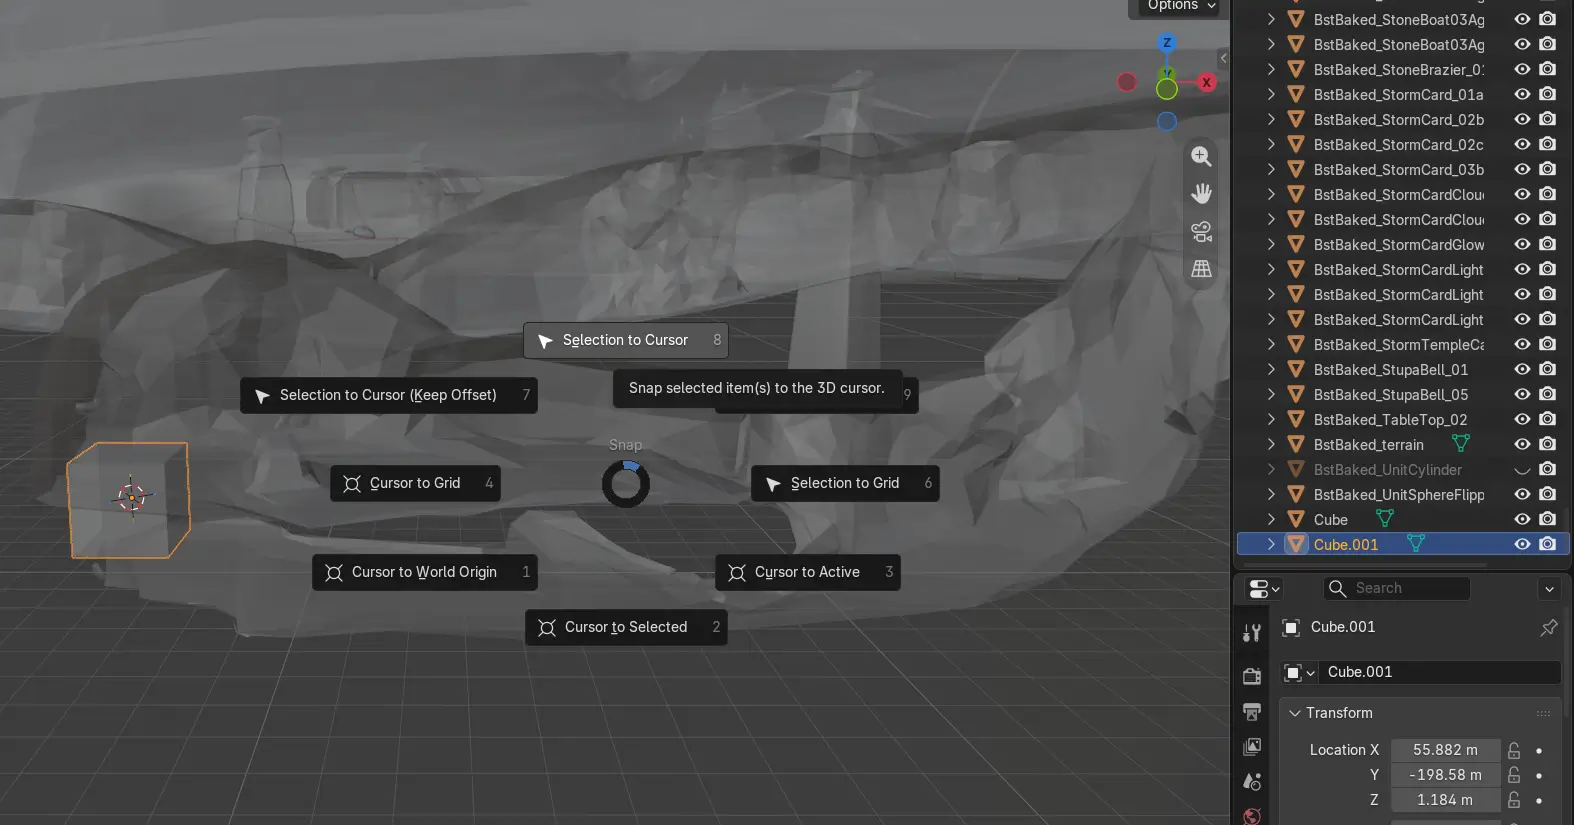
If we got it right, the merged object looks like this: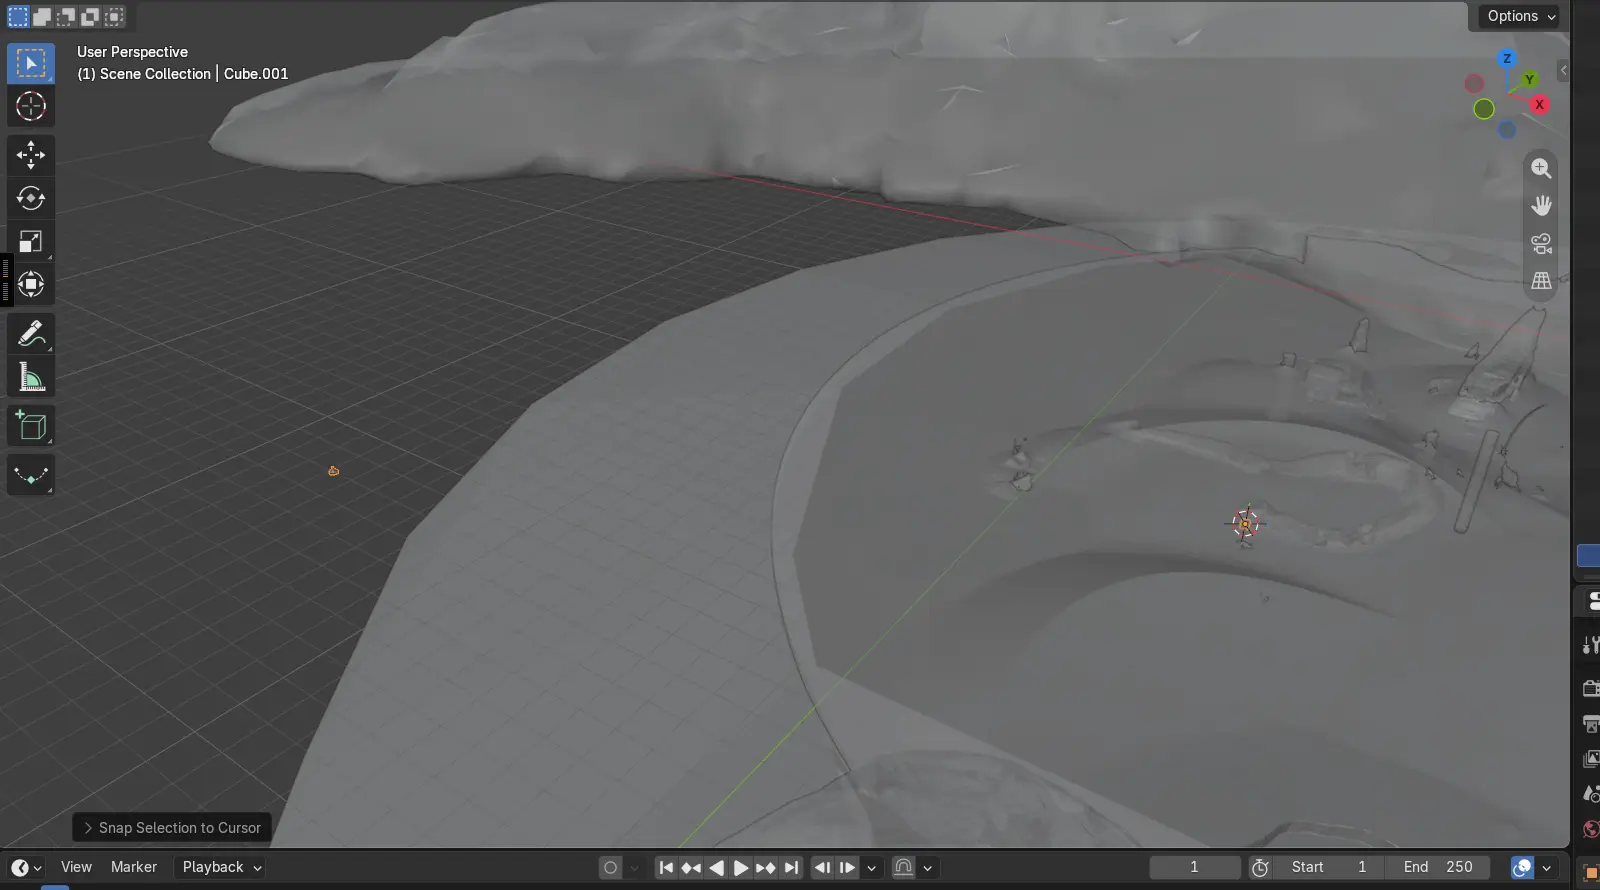
Rotate A until B sits somewhere reachable. With X and Y kept at multiples of 90 degrees, B may end up upside-down at this point — that's fine.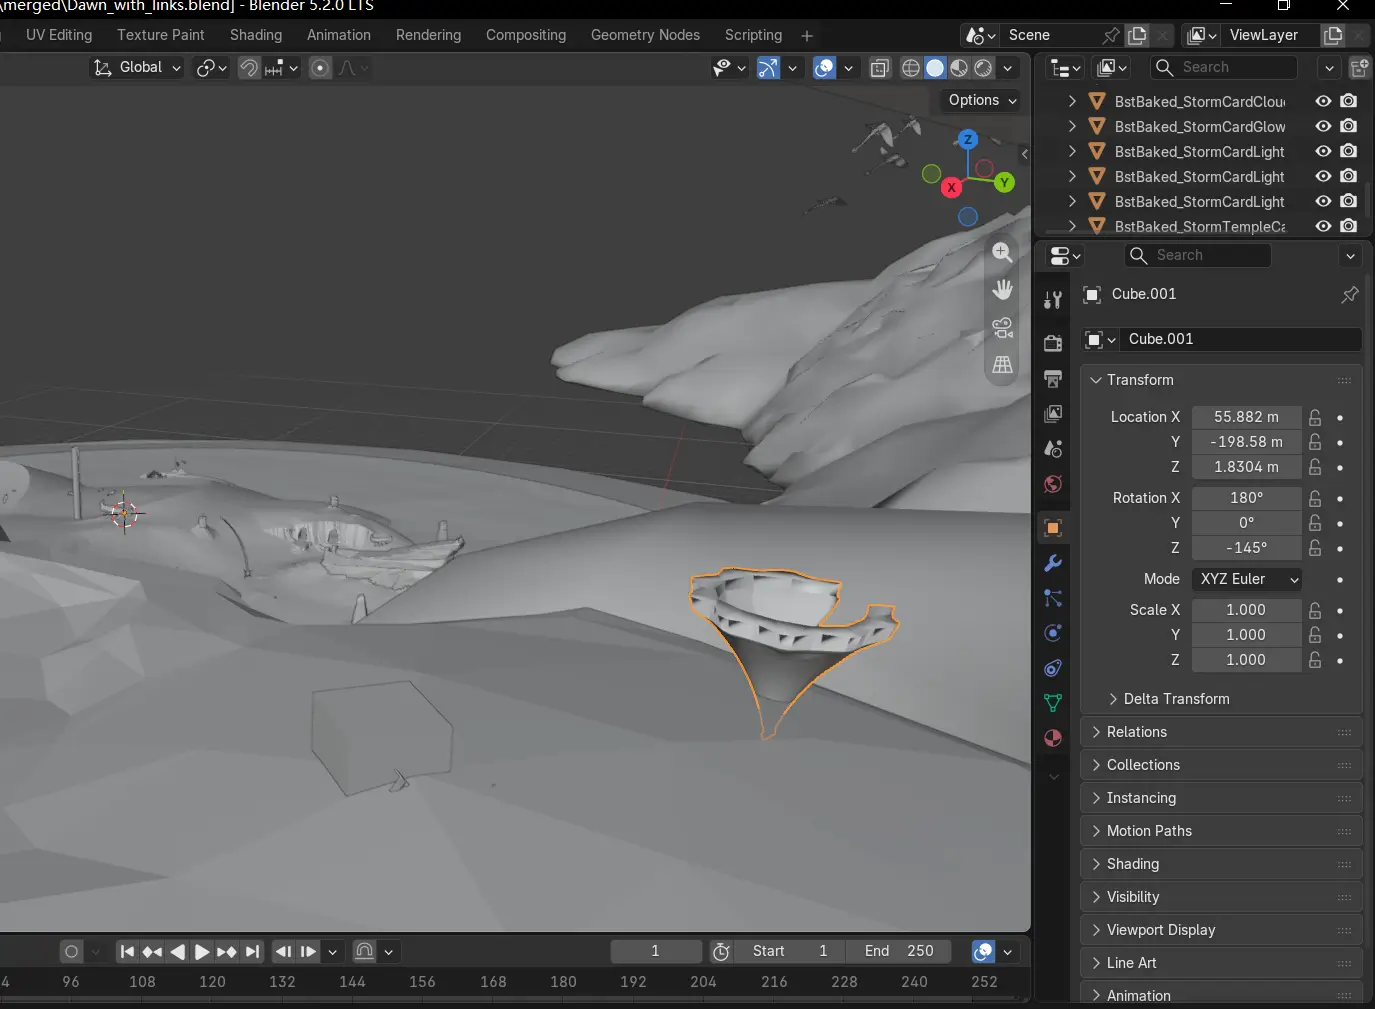
The Third Point
One more. New spot, new A, new B.
Cursor to the first prop's position. Add cube — A. Import prop — B.
Select A, then B. Join.
Cursor to the destination. Snap → Selection to Cursor.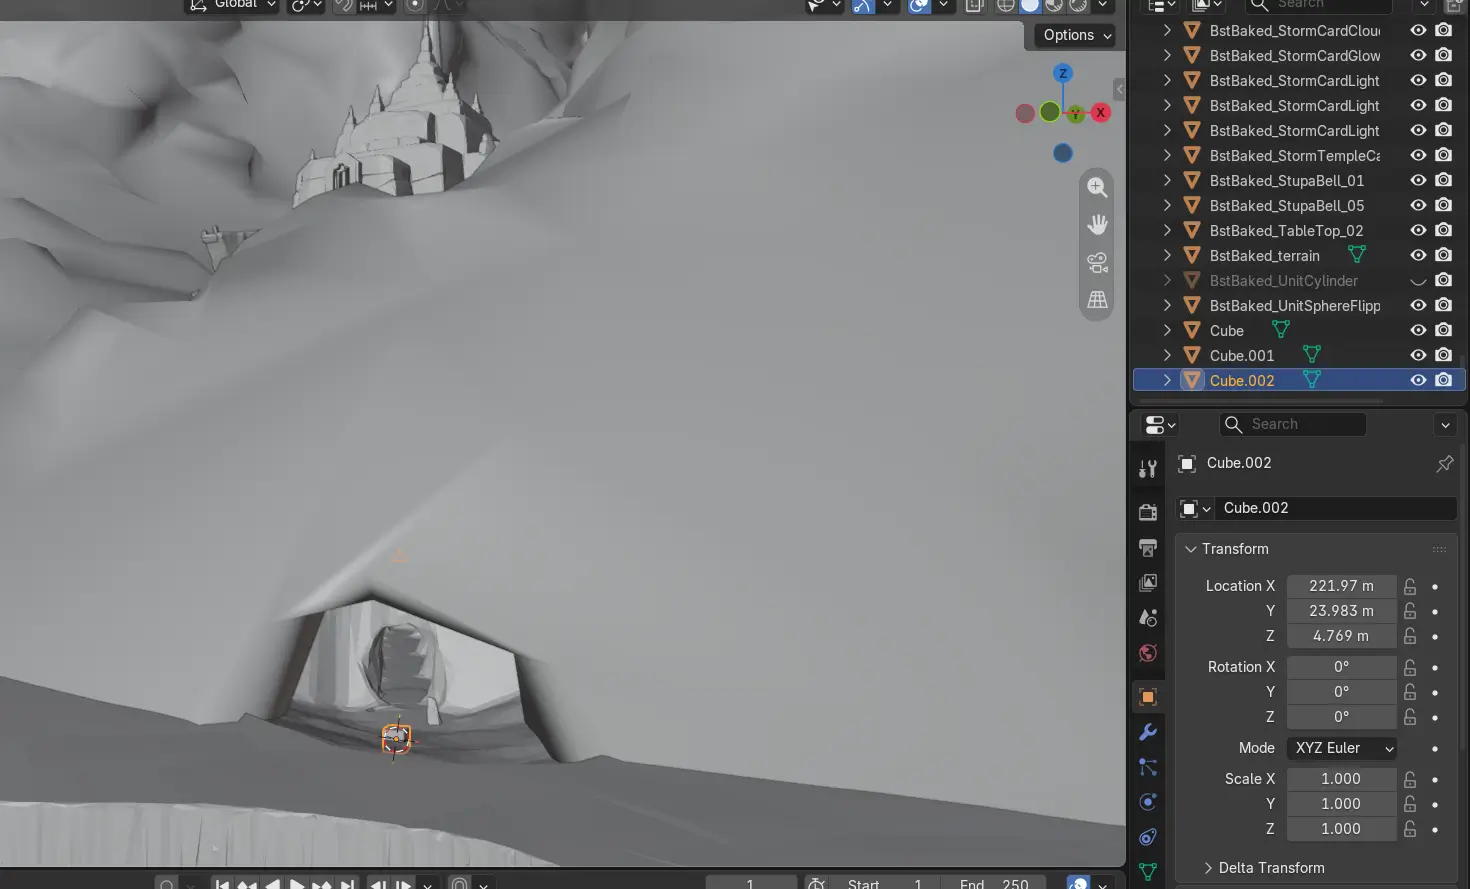
Rotation Z. Stop when B looks right.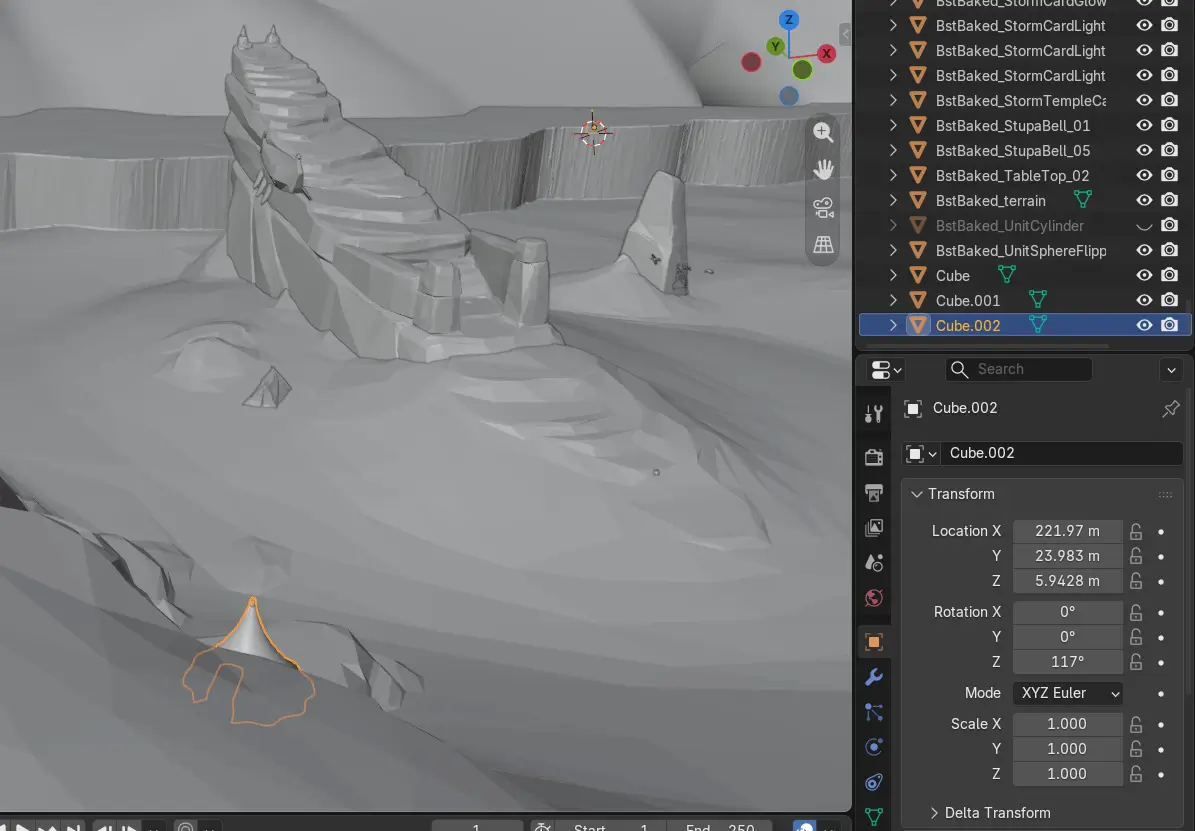
Place It In-Game
We now have B's position and rotation.
Remember where B sits in Blender. Open the game. Drag the second prop to roughly that position.
Turn the rotation dial to the angle from the previous section.
Mid-air placement. Fly up and tap the carpet icon while airborne. The carpet appears flat, with its Z axis pointing up. That's why we kept the X and Y rotation of B at multiples of 90 degrees earlier.
How to Adjust
Test in-game. If the landing point is off, come back.
Now move the origin from A to B. Put the 3D cursor on B — Shift+Right-click on B in the viewport. Then right-click in the viewport to open the Object Context Menu and choose Set Origin → Origin to 3D Cursor.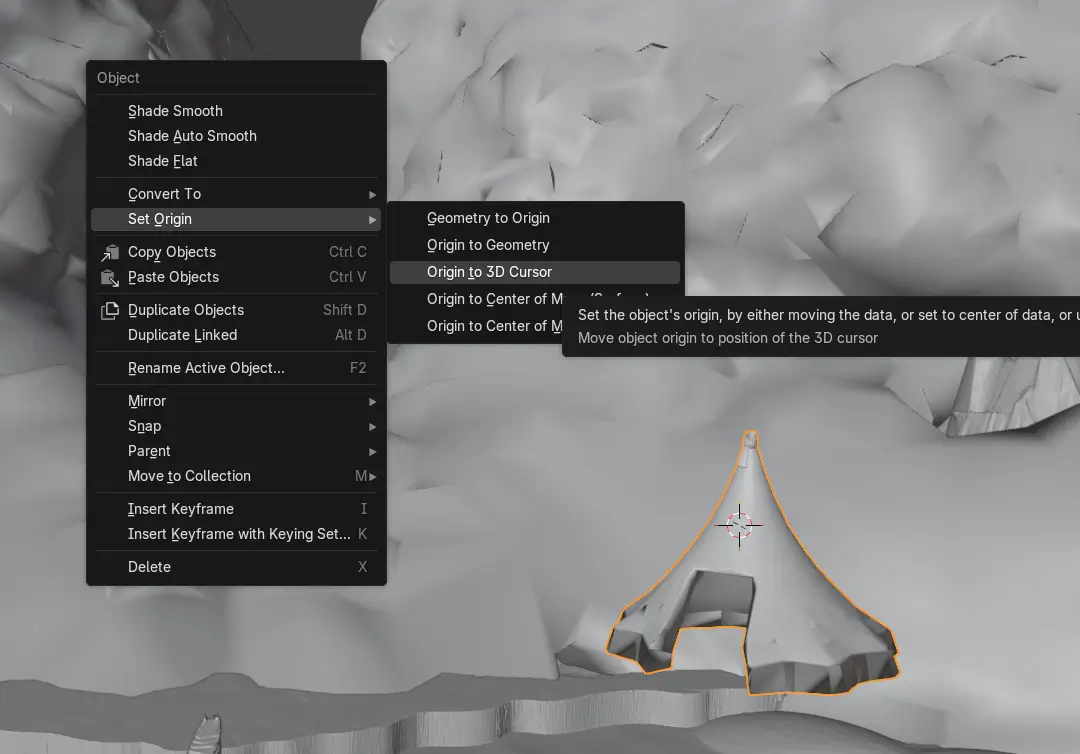
The origin is now on B. Rotate the merged object and watch point A move.
A is the landing point. When we rotate around B, A sweeps an arc. That arc is the path the landing point takes when we rotate the second prop in-game.
Looking from above, if the landing point came out too far to the right, B was rotated too far clockwise. Rotate the opposite direction in-game and the landing point walks back.
If it came out too far left, reverse it.
The arc shows us which direction to turn, and roughly how much. One rotation in Blender replaces several test cycles in-game.
Quite helpful!
Most of the time, I've been calculating coordinates by hand, but when I check them in-game, the points are often unreachable or difficult to place props at. Blender really helps save a lot of time and candles!
My biggest struggle, though, is placing props accurately. Even when I know the exact coordinates, I still can't get them in the right position. Maybe it's because of the Rotex resolution, or I just can't reach the exact spot.
I'm also new to Blender, so I guess I'll spend some time practicing.
Thanks for sharing! Hope you have a nice day!
By the way, can I ask how you managed to push the cage into the ground? :D
no problem. dm me on ig @leasses0